Showing posts with label recipes. Show all posts

Thursday, March 31, 2011

Spring Dish - Pasta Primavera

The dreaded time has come again which has veritably put a stop to all my meal planning.  It's military payday and I am boycotting the commissary til all retirees go back to their retiree dwellings so I can shop in peace.  Though I am always at Publix, the commissary is significantly cheaper for staples like meat and pantry supplies and my supplies are dwindling fast.  But I think I can hold out a day or two, especially since tomorrow night my BFF and I are going to The Crab Shack for some Low Country Boil to celebrate her return to the East Coast.  Until this weekend, I am still responsible for feeding the natives and they get restless at meal times.

So even though I am holding out for prime shopping conditions for my next "big' food shopping, I still have to feed my family.  I looked in my fridge yesterday for meal possibilities when my crisper drawer started calling to me. I had a ton of random veggies, no defrosted meat and what should I do?  The ideas of frittatas (not enough eggs), stir fry (no defrosted meat) and minestrone (no beef broth) danced in my heads til I realized what I could make.  I always ALWAYS have macaroni in the house in various shapes and forms. I also had lemon juice, olive oil and garlic and a ton of beautiful veggies.  I was going to make Pasta Primavera for dinner.

a kaleidoscope of veggie goodness


Primavera is Italian for spring and this dish represents the vegetable bounty that spring brings us.  I like to think of it as a dumping ground for all the veggies I don't want to throw out because they sat too long in my fridge.  You can use whatever you have in the house, like I did.  The one thing I love about this dish is how colorful it is.  You always hear TV doctors talking about incorporating a rainbow of fruits and veggies in your diet and this dish does just that, it looks amazing without lacking any flavor and it's good for you!

Pasta Primavera
2-3 random colored Bell Peppers ( I used about 8 of the mini bell peppers), julienned
1/2 bunch of asparagus, chopped into 1 in pieces
1 large zucchini, julienned
2 handfuls of string beans, chopped into 1 inch pieces
1/2 red onion, sliced thinly
2-4 cloves of garlic ( I used 4, but you know me, I fear Dracula. You can use as little as you like)
enough olive oil to cover bottom of large skillet ( I know it sounds like alot, but the olive oil is half of your sauce)
1.5 C lemon juice
1 tsp red pepper flakes (optional)
1 TSP lemon pepper seasoning
1 TBSP italian seasoning
1 TBSP dried oregano
1 box of your favorite macaroni (Primavera is usually made with Angel Hair pasta, I used Rotini because it was what I had in the house)
s&p to taste
2 tbsp butter (optional)
grated cheese (optional)
  • Start your pot for boiling macaroni.
  • In a large skillet, heat on medium high and add olive oil.  Once hot add garlic and red pepper flakes.  Sautee for a minute then add onions.
  • Once onions start to soften, about 2-3 minutes, add your assorted vegetables.  Season with salt, lemon pepper seasoning, italian seasoning and oregano.  Let them sautee for about 2-3 minutes (don't let them carmelize) and then add lemon juice.  Lower heat to low and Cover.
  • Once water is boiling for macaroni, add salt and pasta.  Boil, uncovered til macaroni is al dente.
  • Once the macaroni is about finished, glaze off your vegetable sauce with the butter and add some fresh ground pepper.  The butter helps add depth to the sauce but this is completely optional.
  • Drain macaroni and add to the skillet with the vegetables.  Toss the macaroni and vegetables to evenly coat with sauce.
  • Serve with grated cheese if desired.


Saturday, March 26, 2011

The Humble Chicken Cutlet


Where can I start about this fried piece of chicken goodness.  Most Italians I know grew up eating chicken cutlets like most Southerners were raised on healthy portions of fried chicken.  I grew up eating cutlets, whether it was chicken, pork or veal.  My mother and grandmother often made them as the main course of a family meal and the left overs never lasted longer than a day or so.  As I have become older and more aware, I stopped eating veal.  But when my grandmother made veal cutlets I would eat them; she was the only person I would eat veal for.  Man, were those politically incorrect cutlets tasty.  In our home, the tradition of the chicken cutlet still exists, so much so that my chicken cutlets don't last much longer than the cutlets of my childhood.  My husband is especially fond of my cutlets and I had to beg him off this time from eating too many. I had planned on making a quick parmigiana and I needed left overs in order to do so.

The humble chicken cutlet is not only delicious, but it is also versatile.  It can be sliced for a salad, used as a meat in a sandwich (one of my favorite heroes is topped with chicken cutlet, roasted pepper and fresh mozzarella and balsamic vinegar) or can become the famous chicken parmigiana.  In our family, the favorite way to eat them is cold, right out of the fridge with maybe a napkin.

Now that I have a meat thermometer, I was able to fry this latest batch of cutlets with out mutilating them in the process.  I don't know how my mom or grandmother knew when the cutlets were cooked fully but I have never trusted my frying times. I would cut my cutlets to check to see if they were done.  After having pieces of raw chicken in a Ceasar salad while at Outback Steakhouse years ago (why I won't eat there to this day), I always check my chicken to see if it's fully cooked.  With the meat thermometer it only takes a poke. I found 160 degrees to be the perfect internal temperature for the cutlets to be crispy on the outside and juicy on the inside.

I use chicken tenders for my cutlets.  But if you have a butcher, or if it is more cost effective to filet chicken breasts to cutlet size than so be it.  I definitely suggest you try making them, it will definitely be worth your while!  The best part is you get to make bread balls with the left over eggs and bread crumb, they are just as good as the cutlets and for me, they are the first thing I eat after spending 30 minutes standing in front of a hot stove frying cutlets.

Chicken Cutlet, sauteed green beans, bread ball and couscous
Chicken Cutlets
2 packs chicken tenders (about 3 lbs of chicken breast, filleted)
2 C (about) Italian seasoned bread crumbs
1/2 C (about) grated cheese
3 eggs
3 TBSP milk
1 container vegetable oil
salt
  • Take out three plates.  In one plate whisk the eggs and milk.  On the second plate combine grated cheese and bread crumbs.  The third plate is for the breaded chicken cutlets.
  • Bread the chicken cutlets by first dipping in the egg mixture and then into the bread crumbs.  Place breaded cutlet on third plate and bread all pieces of chicken.
  • In a large skillet, fill with oil til it is about an inch deep.  Heat oil on medium high heat.
  • Fry chicken cutlets about 3-4 minutes per side, til internal temperature is 160 degrees and both sides are golden brown.
  • Drain on a plate lined with a paper towel.  Salt as soon as chicken is removed from the oil.
Bread Ball
Left over bread crumb mixture
Left over egg mixture
  • Combine bread crumb and egg til it forms into a dough like consistency.
  • Form into patty shape.
  • Fry after all cutlets are done, about 3-4 minutes.

Tuesday, March 1, 2011

The Veritable Wonders of Beans and Scarole

A toy war is going on between my kids as I start to write this entry and I get questions why I don't update more often.  I have tons of food pictures in iPhoto all prepped and ready to go on my hard drive and between the daily chores of a housewife and finding the stirrings of my inner, hungry muse, I do not update as much as I would like.  But alas, I am working on amending that.

Sunday was another busy day in our house, church with the kids then the obligatory Clary's lunch with Jessica and her son TJ.  On my way home, I called my parents to see how they were doing.  My parents have gotten on a health kick lately and my mom was searching me for ideas on healthy meals she could make for she and my dad.  I was stuffed from a Spinach Bacon salad I had at Clary's and the thoughts of dinner hadn't crossed my overly full mind.  My mom brought up how we had been eating out frequently lately to which I agreed.  We had been going out to eat a lot as I am often too tired to cook at night.  She proceeded to tell me what she was making for dinner - a roast chicken and a side of escarole or scarole as we call it.  The light bulb went off in my head and scarole was the perfect dinner for us to have after eating like crap the past few days.  There is one thing I know about scarole, and it is perfect for flushing all the bad stuff out of you, literally.

I usually reserve literal toilet humor for my husband and best friend; a food blog is usually not the place to talk about what becomes of food after we are through with it.  But when I think of scarole, I can't help but hear my dear grandmother's voice in my head preaching the colon-cleansing wonders of this dark, leafy green.  This is the same woman who would tell people to "shit in their hat in Macy's window" during loud Sunday dinner conversations so I guess one could say my potty mouth comes, in part, from her.  Later that night, after enjoying my beans and scarole, I decided to google exactly what escarole is and it is a member of the endive/chicory family.  It is also known for it's high fiber content. After reading that, I started laughing saying to myself "My grandmother was right all the times she preached of the benefits of consuming scarole at the dinner table.  It does make you poop."


Scarole was prepared in two ways by my family growing up, either as a main dish with beans in a tomato based sauce or with raisins as a side dish.    I made beans and escarole, utilizing cannelini beans and Tuttorosso tomatoes, which I found at Publix much to my delight. Cans of Tuttorosso tomatoes were a mainstay in my grandmother's kitchen and to be able to incorporate them in a dish that reminds me so much of my grandmother was fitting.  Since I can't find pepper friselles (crisp Italian pepper biscuits that we usually served with this dish), I decided to pair my beans and escarole with a loaf of rustic Tuscan garlic bread I bought at Publix.
Tuscan Garlic Bread served with Herb-Infused Extra Virgin Olive oil

For those of you who haven't been grossed out thanks to my potty talk, here is my recipe for beans and escarole.  It is simple, delicious and your colon will thank you afterwards.

Beans and Scarole
2-3 Heads of Escarole, washed and torn into pieces
2-3 tbsp of olive oil
2-4 cloves of garlic, to taste, chopped
1 Can of crushed tomatoes
1/2 C of water
2 Cans of Cannellini Beans, rinsed
1 tbsp sugar (optional)
s&p
1 tbsp Italian seasoning
grated cheese such as pecorino romano (optional)

  • In a large skillet heat over medium heat. Drizzle olive oil in pan and once hot, add garlic and saute for a minute.  Add escarole and sautee till it starts to wilt. 
  • Once wilted add beans and saute for a minute or two.  Season with s&p if desired.
  • Add the can of crushed tomatoes and water to skillet and season with sugar (I add sugar to my sauce to cut the acidity of the tomatoes but this is completely up to you), Italian seasoning and s&p.
  • Bring to a simmer and reduce heat.  Cook on low til the sauce has reduced and thickened, about 20 minutes
  • Serve topped with grated cheese and s&p if desired.  Enjoy!


Monday, February 7, 2011

Recipes!! Homemade Bread - Herbed Butter - Butternut Squash and Leek Risotto

This weekend was crazy.  Besides taking Lil shopping all day Saturday, I ran around all day Sunday.  I took the kids to church with my friend Jessica then out to lunch to Screaming Mimi's for some delicious pizza and topped it off by going back to her house to let the kids (she has a 2 year old son) run amok.  I finally have time to post the recipes from Saturday night's feast in which I hope you all enjoy my errant display of food porn!

There is must be some kind of karma that works when it comes to recipes, since I started this blog some loyal readers have sent me recipes for their culinary endeavors which I saved to my food bookmark tab.  I can't wait to try them and share my experiences here and I urge you all to try new recipes this week.  You just may find something that you love!


Homemade White Bread (modified from Better Homes and Garden's New Cookbook)
5 cups bread flour
1 pack Fleishmann's Rapid Rise active yeast
2 1/4 C milk
2 tbsp sugar
1 tbsp butter
1 1/2 tsp salt
  • In a large mixing bowl combine 2 1/2 C of flour and active yeast.
  • In a sauce pan heat and combine milk, sugar, butter and salt til 120-130 degrees F.  Check with thermometer to ensure the liquid isn't too hot for our yeasty friends.
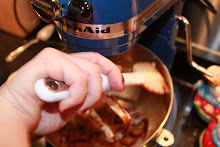
  • Using a stand mixer or hand mixer, combine liquid to the flour yeast mixture.  Beat on medium (I used setting 4 on my Kitchen Aid) for 30 seconds while continuously scraping the bowl.  
  • Raise speed on mixer to high (I used setting 8 on my stand mixer) for 3 minutes.
  • Using a wooden spoon or spatula, combine the rest of the flour into the starter dough.
  • Knead for 6-8 minutes by folding bottom part of the dough over then turning 1/4 turn and repeat.
  • Let rest 10 minutes.
  • Grease two loaf pans.
  • After resting, cut dough in half with dough cutter.  Form loaves by pinching the dough under in an loaf shape.
  • Cover loaves with a cotton towel and let rise about 30-45 minutes in a warm, draft free place (I did this on my stove top, I should have done it in the oven.  And don't be paranoid like me, I incessantly checked it. )
  • Once doubled, preheat the oven for 375 degrees F.  Bake for 35-40 minutes til bread is brown.  
  • Remove from loaf pans and cool on wire rack.
Herb Butter
1 stick of unsalted butter, softened
1/4 C of fresh basil (small handful)
1/4 C fresh parsley    "           "
1 clove of garlic, chopped
about 1 tsp sea salt
1 tsp fresh ground black pepper.
  • Allow butter to soften.  I did this by putting it in a bowl and letting it sit on my stove while I worked on my risotto.
  • Finely chop basil and parsley.
  • Chop up a clove of garlic, add sea salt.  using the side of a knife make scraping motions over salt and garlic til a paste forms.
  • In a bowl, combine butter, herbs and garlic paste.  Season with pepper to taste.
Butternut Squash and Leek Risotto (modified from a Bon Appetit recipe featured in Epicurious IPad App)
2 C Arborio Rice
32 oz container vegetable stock
1 C water
1 large butternut squash, cube
3 heads of leeks, sliced, using only light green and white parts
4 tbsp olive oil
1 tbsp herbes de provence (if you can't find it, you can use thyme)
2 tbsp butter
1/4 C fresh basil, chopped into strands
1/4 C of grated cheese (I used pecorino romano but whatever you prefer is fine)
s&p to taste.
  • In a large heavy bottom pot, add 2-3 tbsp olive oil and heat on medium.  Add butternut squash, season with s&p and sautee for about 5 minutes til softened.  Put into bowl and set aside.
  • Add more olive oil if needed and add leeks and herbes de provence.  Sautee for about 5 minutes but do not allow leeks to turn brown.
  • Add rice to pot with leeks and cook for about 1 minute.  Lower heat to low-medium and add 1 C of vegetable stock and stir til fully absorbed.
  • Once liquid is fully absorbed, add vegetable stock and then water by 1/2 cupfuls, making sure liquid is fully absorbed before adding more.  You will need to continuously stir the risotto to ensure it doesn't stick to the pot.  This should take about 15-20 minutes.
  • Once all liquid is absorbed, add butter, basil, grated cheese and simmer on low heat for 10 minutes.
  • Risotto should be creamy.
  • Serve with a sprinkle of grated cheese and some s&p if desired.