Monday, April 18, 2011

BLS (and I am not talking about Zakk Wylde's band)


About a week ago I was sent to the store to pick up dinner.  Tired of take-out, I was on a mission to feed my family an easy Friday night dinner.  So I packed Lil up and headed to Publix to see what easy food fare I could find.  As we walked around the store in a haphazard manner, I was struck uninspired.  Most of the convenience foods are packed with nasty chemicals that I try to avoid and I was at a loss; til I saw that vine-ripened tomatoes were on sale.  This is when the foodie synapses in my brain started firing: what can I make to utilize these ruby-red savory fruits.  Inspiration struck and I realized I could make bacon-lettuce-spinach sandwiches with soup.

The basic BLT is always a winner in my house, even if my husband and daughter refuse to eat raw tomatoes.  I like classing it up by using baby spinach in lieu of lettuce.  And even though I was looking for easy food fair, I knew plain old bread wasn't going to cut it for these sandwiches.  Even if it is an easy favorite, I wanted to make it special.  So after grabbing my tomatoes and spinach, I raced over to the bakery department fervent with inspiration to grab a loaf of fresh-baked sourdough bread, then onto the meat section for center-cut bacon.  Heading back to the produce section, I grabbed some herbs to make herbed mayo as the condiment.  The vision of my dinner was forming fast and I was almost done with my shopping trip til I realized I was clueless as to what soup I could make as an accompaniment.  Hitting a peak of inspiration, I grabbed fresh tortellinis and chicken stock to make tortellini soup, a favorite of mine growing up that I now make for my family (Hi Mom!).


Simple and easy, this dinner was definitely a crowd pleaser.  Perfectly grilled sourdough bread complemented the fragrant basil-chive mayo, tender baby spinach, salty bacon and earthy tomatoes. Accompanied by the tortellini soup, this made for a dinner which shined in it's simplicity.  The tortellini soup was such a hit that my daughter begged me to save her left-overs for next-day's lunch.


Next time you go grocery shopping, allow yourself to be inspired by whatever tickles your fancy and let your creativity be your guide when you are creating your menu.  You just might surprise yourself with what you come up with!

Saturday, April 16, 2011

Wow...

2 + weeks since my last post.  I apologize for that.  Sometimes life just gets into the way and these past two weeks have surely been busy.  Between soccer practices, doggy pack walks, parties and even adding a new member to our pack (Marla, an 18 month old bully mix who is sweet as pie) I kind of let my blogging slack.  I have had good intentions about blogging, taking photos and mental notes about certain recipes to be tucked away for a less hectic day where the blogging would roll freely. (Un)fortunately that day is today.  We all know what they say about the road of good intentions and where it leads...

to rice krispie treats?

I figured I would ease my way back into the blogosphere with a treat recipe that I made this week for my daughter's easter party at school.  It is easy and tasty and you can't buy a box of Rice Krispies without finding the recipe printed somewhere on the box.  I chose to make rice krispie treats for her class because I have been craving them.  The processed treats you can buy in the store taste like the chemicals used to preserve them so I never buy them. There is nothing like a homemade Rice Krispy treat.  It's warm and gooey and tastes of home (well, at least for me).  I googled various holiday inspired treat recipes and found the perfect one for the upcoming spring holiday: Rice Krispie Treat shaped eggs.  I sprinkled pastel colored sugar on the top of the eggs and voila, I had the piece de resistance of the goody bags for my daughter's school party.


The best part of the recipe is that the cooking part takes place in the microwave.  You don't even need to light the stove!


Rice Krispie Treat Eggs (recipe makes 20 eggs. If you need less then just halve the recipe)
1 box Rice Krispie cereal
2 bags of Jumbo marshmallows
6 Tbsp butter
Pam cooking spray
egg shaped cookie cutter
colored sugar or other edible embellishments.

  • In a large, microwavable bowl, add 1 bag of marshmallows and 3 tbsp of butter (this recipe is made in 2 batches).  Melt on high for 2 minutes.  Take bowl out of microwave, stir, and microwave for another minute.
  • Add 6 cups of Rice Krispies to marshmallow mixture and combine.
  • Allow to cool for a minute or too.  
  • Take your egg shaped cookie cutter and spray with Pam.  Spray your hands with Pam too so the Rice Krispie treats don't stick while you are molding the eggs.
  • Take enough Rice Krispie treat mixture to fill the cookie cutter.  Using your hands, mold the egg in the cutter so it takes on the shape of the egg, making sure to flatten out the broad sides (top and bottom) of the egg.
  • Place on cooling rack.  Sprinkle with candies, colored sugar etc.
  • Enjoy!

Thursday, March 31, 2011

Spring Dish - Pasta Primavera

The dreaded time has come again which has veritably put a stop to all my meal planning.  It's military payday and I am boycotting the commissary til all retirees go back to their retiree dwellings so I can shop in peace.  Though I am always at Publix, the commissary is significantly cheaper for staples like meat and pantry supplies and my supplies are dwindling fast.  But I think I can hold out a day or two, especially since tomorrow night my BFF and I are going to The Crab Shack for some Low Country Boil to celebrate her return to the East Coast.  Until this weekend, I am still responsible for feeding the natives and they get restless at meal times.

So even though I am holding out for prime shopping conditions for my next "big' food shopping, I still have to feed my family.  I looked in my fridge yesterday for meal possibilities when my crisper drawer started calling to me. I had a ton of random veggies, no defrosted meat and what should I do?  The ideas of frittatas (not enough eggs), stir fry (no defrosted meat) and minestrone (no beef broth) danced in my heads til I realized what I could make.  I always ALWAYS have macaroni in the house in various shapes and forms. I also had lemon juice, olive oil and garlic and a ton of beautiful veggies.  I was going to make Pasta Primavera for dinner.

a kaleidoscope of veggie goodness


Primavera is Italian for spring and this dish represents the vegetable bounty that spring brings us.  I like to think of it as a dumping ground for all the veggies I don't want to throw out because they sat too long in my fridge.  You can use whatever you have in the house, like I did.  The one thing I love about this dish is how colorful it is.  You always hear TV doctors talking about incorporating a rainbow of fruits and veggies in your diet and this dish does just that, it looks amazing without lacking any flavor and it's good for you!

Pasta Primavera
2-3 random colored Bell Peppers ( I used about 8 of the mini bell peppers), julienned
1/2 bunch of asparagus, chopped into 1 in pieces
1 large zucchini, julienned
2 handfuls of string beans, chopped into 1 inch pieces
1/2 red onion, sliced thinly
2-4 cloves of garlic ( I used 4, but you know me, I fear Dracula. You can use as little as you like)
enough olive oil to cover bottom of large skillet ( I know it sounds like alot, but the olive oil is half of your sauce)
1.5 C lemon juice
1 tsp red pepper flakes (optional)
1 TSP lemon pepper seasoning
1 TBSP italian seasoning
1 TBSP dried oregano
1 box of your favorite macaroni (Primavera is usually made with Angel Hair pasta, I used Rotini because it was what I had in the house)
s&p to taste
2 tbsp butter (optional)
grated cheese (optional)
  • Start your pot for boiling macaroni.
  • In a large skillet, heat on medium high and add olive oil.  Once hot add garlic and red pepper flakes.  Sautee for a minute then add onions.
  • Once onions start to soften, about 2-3 minutes, add your assorted vegetables.  Season with salt, lemon pepper seasoning, italian seasoning and oregano.  Let them sautee for about 2-3 minutes (don't let them carmelize) and then add lemon juice.  Lower heat to low and Cover.
  • Once water is boiling for macaroni, add salt and pasta.  Boil, uncovered til macaroni is al dente.
  • Once the macaroni is about finished, glaze off your vegetable sauce with the butter and add some fresh ground pepper.  The butter helps add depth to the sauce but this is completely optional.
  • Drain macaroni and add to the skillet with the vegetables.  Toss the macaroni and vegetables to evenly coat with sauce.
  • Serve with grated cheese if desired.


Saturday, March 26, 2011

The Humble Chicken Cutlet


Where can I start about this fried piece of chicken goodness.  Most Italians I know grew up eating chicken cutlets like most Southerners were raised on healthy portions of fried chicken.  I grew up eating cutlets, whether it was chicken, pork or veal.  My mother and grandmother often made them as the main course of a family meal and the left overs never lasted longer than a day or so.  As I have become older and more aware, I stopped eating veal.  But when my grandmother made veal cutlets I would eat them; she was the only person I would eat veal for.  Man, were those politically incorrect cutlets tasty.  In our home, the tradition of the chicken cutlet still exists, so much so that my chicken cutlets don't last much longer than the cutlets of my childhood.  My husband is especially fond of my cutlets and I had to beg him off this time from eating too many. I had planned on making a quick parmigiana and I needed left overs in order to do so.

The humble chicken cutlet is not only delicious, but it is also versatile.  It can be sliced for a salad, used as a meat in a sandwich (one of my favorite heroes is topped with chicken cutlet, roasted pepper and fresh mozzarella and balsamic vinegar) or can become the famous chicken parmigiana.  In our family, the favorite way to eat them is cold, right out of the fridge with maybe a napkin.

Now that I have a meat thermometer, I was able to fry this latest batch of cutlets with out mutilating them in the process.  I don't know how my mom or grandmother knew when the cutlets were cooked fully but I have never trusted my frying times. I would cut my cutlets to check to see if they were done.  After having pieces of raw chicken in a Ceasar salad while at Outback Steakhouse years ago (why I won't eat there to this day), I always check my chicken to see if it's fully cooked.  With the meat thermometer it only takes a poke. I found 160 degrees to be the perfect internal temperature for the cutlets to be crispy on the outside and juicy on the inside.

I use chicken tenders for my cutlets.  But if you have a butcher, or if it is more cost effective to filet chicken breasts to cutlet size than so be it.  I definitely suggest you try making them, it will definitely be worth your while!  The best part is you get to make bread balls with the left over eggs and bread crumb, they are just as good as the cutlets and for me, they are the first thing I eat after spending 30 minutes standing in front of a hot stove frying cutlets.

Chicken Cutlet, sauteed green beans, bread ball and couscous
Chicken Cutlets
2 packs chicken tenders (about 3 lbs of chicken breast, filleted)
2 C (about) Italian seasoned bread crumbs
1/2 C (about) grated cheese
3 eggs
3 TBSP milk
1 container vegetable oil
salt
  • Take out three plates.  In one plate whisk the eggs and milk.  On the second plate combine grated cheese and bread crumbs.  The third plate is for the breaded chicken cutlets.
  • Bread the chicken cutlets by first dipping in the egg mixture and then into the bread crumbs.  Place breaded cutlet on third plate and bread all pieces of chicken.
  • In a large skillet, fill with oil til it is about an inch deep.  Heat oil on medium high heat.
  • Fry chicken cutlets about 3-4 minutes per side, til internal temperature is 160 degrees and both sides are golden brown.
  • Drain on a plate lined with a paper towel.  Salt as soon as chicken is removed from the oil.
Bread Ball
Left over bread crumb mixture
Left over egg mixture
  • Combine bread crumb and egg til it forms into a dough like consistency.
  • Form into patty shape.
  • Fry after all cutlets are done, about 3-4 minutes.

Thursday, March 24, 2011

My 5 Year Old's Favorite Vegetable

Yesterday I was in Publix (yes, I live in that store, even if they do underpay their migrant farmers) doing a quick grocery shopping while I gather steam to venture to the commissary (shudder) sometime in the near future.  We were in the produce department picking up some fruits and veggies to counteract last week's restaurant binge.  Since I had Lily with me, I let her help me pick out what to purchase and my daughter chose nectarines and plums for my counter fruit tower.  We moved onto the veggies, where I had to pick up green beans when I hear my daughter squeal in delight.  "Mama, you have to get my favorite vegetables! " I hear Lil say as she points to a pack of asparagus.  I was in awe that my 5 year old daughter's favorite vegetable is asparagus, of all green veggies.  I know adults who won't even touch them.  We love asparagus in our house, even if it makes our pee smell funny and Mike and I's love has passed down to our daughter.  I couldn't be prouder that my daughter would pick such a "non-kid friendly" vegetable to proclaim her love for.  I dutifully picked up the pack of asparagus and added it to my shopping basket because who wouldn't deny their kid something so healthy, especially after I gave in to her demands for Cap'n Crunch cereal.


Ever since she was little, she has always been a great eater, even when doctor's were concerned over her size (petite). Luckily, we have a great pediatrician who reminds us how healthy and brilliant Lily is even if she is tiny for her age.  This kid can eat!  Not only does she like to eat, but she loves healthy food, like fresh fruits and veggies and water is her favorite beverage.  I don't force my kids to eat food they don't like, but we have a strict 3 bite rule in our house.  Needless to say, the kids have had a chance to try various foods and most of the time they find they like them.  I am a firm believer that our kids learn by our example, especially when it comes to food and this is proof.

After I put the asparagus into my basket, Lil asked me to prepare them in her favorite way, with lemon juice.  Though I didn't make them last night, I made her favorite asparagus tonight before her first soccer practice and it was a hit.  Here is the recipe, it is so simple and easy you just might have your kids proclaiming their love for these green stalks!

Lil's Asparagus
1 bunch Asparagus
2-3 tbsp olive oil
2 tbsp lemon juice
s&p
  • Cut or snap the tough bottoms of the asparagus.  If you bend the asparagus, it will snap at the tough part.
  • In a casserole, add asparagus, olive oil, lemon juice and s&p.  Coat asparagus with evenly by mixing with your hands or a spoon (I chose hands)
  • Preheat oven to 350 degrees and roast in oven for about 30 minutes til tender.

Tuesday, March 22, 2011

Pepperoni vs. Turkey Pepperoni

I think I have to trade in my (half) Italian-American card.
  

I have found I like turkey pepperoni better than regular pepperoni.


I am a snacker, I like having easy foods in the house for me to nosh on through out the day, it also is great for my two kids who, though both in the 25th%ile for height and weight, love to eat.  They can eat us out of house and home a few days after grocery shopping.  Turkey pepperoni is one of my go-to snack items when I am grocery shopping because we all love it, even Rex (have you ever seen a 70 lb boxer try to muzzle out the last pepperoni from a bag, it's instant comedy).  I choose turkey pepperoni because it has significantly less fat than it's counterpart and since this is a regular snack in our house, I try to choose healthy, well, as healthy as processed meats go.

Two weeks ago, on the day my parents arrived from the frigid tundra (aka Pocono mountains) I grabbed Lil and we went to Publix to load up on all the good Italian treats I grew up eating, like cold cuts (lunch meat), fresh mozzarella, olives, roasted peppers, italian bread, pepperoni and even soppresata (a hard Italian sausage).  I swear Publix is the grocery store for displaced New Yorkers below the Mason-Dixon line because only there I can find pretty much all the yummy foods I grew up with.


Anyways, yesterday I was in an especially hungry mood and I still had some left over pepperoni from my parent's visit along with a bag of turkey pepperoni disks. I grabbed both knowing the vultures would soon be descending and I took the kids outside to play on the swing set, trying to divert them from my pepperoni bounty.  I first ate a few pieces of the regular pepperoni, and while it's tasty, I realized I missed the meaty texture of the turkey pepperoni.  The taste was there, but the pepperoni was greasy, something my turkey pepperoni trained taste buds were not used to.  I fed the last few pieces to the dog, praying that this wouldn't result in room clearing gas later in the day and then I started on the turkey pepperoni.  The turkey pepperoni was everything I learned to expect in pepperoni, spicy, slightly chewy and 70% less fat.

 I had found an alternative to a high fat food item and now regular pepperoni had become a lesser alternative to the turkey pepperoni thus reversing roles.  I questioned what this meant to my Italian-ess but I didn't care, I know what I like and I like turkey pepperoni more.  My arteries will be thanking me one day...

Sunday, March 20, 2011

Corned Beef Cabbage on St Joseph's Day??

Another long hiatus between posts which I apologize for.  My parents were in town the past week visiting for my 28th birthday.  Not only did we have a wonderful time with my parents, we also ate really well.  The first night they were here, I made flank steak fajitas and pepper, onion, tomato shish kebobs that my husband, Mike grilled perfectly.  Then it was my birthday, where we went to Clary's for an amazing breakfast (I had the Eggs Benedict Florentine- OMG is the only way to describe them) followed with a day at the beach and then Crab Shack for dinner.

Dinner would have been perfect if it wasn't for Savannah's resident bug - the sand gnat- feasting on us as we feasted on the fruits of the sea.  My parents treated us for the sea food feast where we started the face stuffing with crab stew and raw oysters.  My parents and I gobbled down the platter in no time flat and Mike, though decidedly grossed out, took pictures of me enjoying these delightful mollusks:
open wide

nom nom nom

ooh that's good

happy me :)

The feasting didn't stop after my birthday, so much so that I won't even look at my scale never mind weigh myself.  On Monday, Mike and I celebrated 5 years being married by going to Troy while my parents watched the kids, then Tuesday we ate at a cafe in City Market for lunch.  I convinced my parents to go to Troy that night for dinner sans us and they thoroughly enjoyed it.  Wednesday we had Screaming Mimi's for dinner after a long afternoon looking at properties for my parents to buy (they are considering moving to Georgia part-time to escape the brutal Pennsylvania winters) and then Thursday was St. Paddy's day.

Growing up, my mom always made corned beef and cabbage on St. Paddy's and this is one meal that I never learned how to prepare.  She happily made the corned beef for us to feast on and I am surprised how easy it was to prepare.  All you need is a large pot (or slow cooker) corned beef, water, some potatoes and a head of cabbage.  We bought horseradish sauce and rye bread as accompaniments and we feasted on this decidedly Irish dish (though corned beef is really a Jewish delicacy, how it became associated with the Irish is muddled in immigrant history).
my mom slicing the corned beef

boiled potatoes

corned beef, cabbage and potatoes
For dessert (and man did we have our share of desserts) we enjoyed Entenmann's festive St. Paddy's day cupcakes.  We can't get these in Georgia though they do sell some Entenmann's products. I learned this horrible truth when I was pregnant with my son and all I craved were these cupcakes, I drove to 4 different grocery stores to find they never heard of them, never mind carried them.  My mother, taking pity on me shipped me down two boxes.  This time, my mother bought two boxes which she freezed then drove 800 miles down for us to enjoy.  I think I did a happy dance in my kitchen when I saw she had brought me these little processed cakes of deliciousness.  Thanks Ma!

Thursday, March 10, 2011

Random Thoughts on Messy Kitchens

I haven't been posting lately and honestly, I have been feeling uninspired.  Sure, I have been cooking but I guess I have been having some sort of a writer's block when it comes to translating those experience into blog posts.  So here is a random though to get me back into the groove of sharing my love of food with you all.

Yesterday, I spent the better part of my morning scrubbing down my kitchen and rearranging junk drawers.  The granite shown, the dishes were clean and everything was in it's place. I, then, proceeded to wreck my kitchen by not only cooking dinner (homemade chicken tikka masala with rice and peas and naan bread) but I even whipped up homemade banana bread.  My husband, after arriving from a long day at school sang the praises of what an amazing wife he had, not only was the house clean but he had another amazing dinner to look forward to.

We were discussing art, something we do frequently as my husband is a Sequential Art (think comic books) student at SCAD when I compared our kitchen to a blank canvas.  It always seems the day I scrub the kitchen to shiny magnificence, I subsequently make the biggest mess.  It is like a clean kitchen inspires me to have fun by cooking some great food and undo all the hard work I had just done by cleaning it. Then an analogy, all be it not a good one, hit about how my kitchen is my canvas, and with the smears of flour, of sauce, of stray veggies, something wonderful comes out of it all in the end.  My art is my cooking, my passion for food is unequivocable.

So I leave off on that random thought with some of the "art" I have created as of late that hasn't yet been shown in my blog.  Enjoy!

Penne with Broccoli Rabe and Italian Sausage

Spinach-Bacon Salad with Hot Bacon Dressing
Homemade Mac n Cheese


Tuesday, March 1, 2011

The Veritable Wonders of Beans and Scarole

A toy war is going on between my kids as I start to write this entry and I get questions why I don't update more often.  I have tons of food pictures in iPhoto all prepped and ready to go on my hard drive and between the daily chores of a housewife and finding the stirrings of my inner, hungry muse, I do not update as much as I would like.  But alas, I am working on amending that.

Sunday was another busy day in our house, church with the kids then the obligatory Clary's lunch with Jessica and her son TJ.  On my way home, I called my parents to see how they were doing.  My parents have gotten on a health kick lately and my mom was searching me for ideas on healthy meals she could make for she and my dad.  I was stuffed from a Spinach Bacon salad I had at Clary's and the thoughts of dinner hadn't crossed my overly full mind.  My mom brought up how we had been eating out frequently lately to which I agreed.  We had been going out to eat a lot as I am often too tired to cook at night.  She proceeded to tell me what she was making for dinner - a roast chicken and a side of escarole or scarole as we call it.  The light bulb went off in my head and scarole was the perfect dinner for us to have after eating like crap the past few days.  There is one thing I know about scarole, and it is perfect for flushing all the bad stuff out of you, literally.

I usually reserve literal toilet humor for my husband and best friend; a food blog is usually not the place to talk about what becomes of food after we are through with it.  But when I think of scarole, I can't help but hear my dear grandmother's voice in my head preaching the colon-cleansing wonders of this dark, leafy green.  This is the same woman who would tell people to "shit in their hat in Macy's window" during loud Sunday dinner conversations so I guess one could say my potty mouth comes, in part, from her.  Later that night, after enjoying my beans and scarole, I decided to google exactly what escarole is and it is a member of the endive/chicory family.  It is also known for it's high fiber content. After reading that, I started laughing saying to myself "My grandmother was right all the times she preached of the benefits of consuming scarole at the dinner table.  It does make you poop."


Scarole was prepared in two ways by my family growing up, either as a main dish with beans in a tomato based sauce or with raisins as a side dish.    I made beans and escarole, utilizing cannelini beans and Tuttorosso tomatoes, which I found at Publix much to my delight. Cans of Tuttorosso tomatoes were a mainstay in my grandmother's kitchen and to be able to incorporate them in a dish that reminds me so much of my grandmother was fitting.  Since I can't find pepper friselles (crisp Italian pepper biscuits that we usually served with this dish), I decided to pair my beans and escarole with a loaf of rustic Tuscan garlic bread I bought at Publix.
Tuscan Garlic Bread served with Herb-Infused Extra Virgin Olive oil

For those of you who haven't been grossed out thanks to my potty talk, here is my recipe for beans and escarole.  It is simple, delicious and your colon will thank you afterwards.

Beans and Scarole
2-3 Heads of Escarole, washed and torn into pieces
2-3 tbsp of olive oil
2-4 cloves of garlic, to taste, chopped
1 Can of crushed tomatoes
1/2 C of water
2 Cans of Cannellini Beans, rinsed
1 tbsp sugar (optional)
s&p
1 tbsp Italian seasoning
grated cheese such as pecorino romano (optional)

  • In a large skillet heat over medium heat. Drizzle olive oil in pan and once hot, add garlic and saute for a minute.  Add escarole and sautee till it starts to wilt. 
  • Once wilted add beans and saute for a minute or two.  Season with s&p if desired.
  • Add the can of crushed tomatoes and water to skillet and season with sugar (I add sugar to my sauce to cut the acidity of the tomatoes but this is completely up to you), Italian seasoning and s&p.
  • Bring to a simmer and reduce heat.  Cook on low til the sauce has reduced and thickened, about 20 minutes
  • Serve topped with grated cheese and s&p if desired.  Enjoy!


Wednesday, February 23, 2011

Where to Eat - Savannah Edition

As much as I love to cook I also love to go out for a great meal, especially if that meal is to be found in unexpected places. I prefer to go to Mom & Pop establishments because to me, it is an investment into the local community's economy.  Plus, I find the food is always better than at most chain restaurant.  When my husband and I debated whether to move back to NYC or stay in Savannah once he retired from the Army, I have to admit our favorite greasy spoons and local restaurants played a part in our decision to stay in Savannah and put down roots by buying our first home.  If you ever get a chance to visit this tiny Southern jewel of a city, here is a list of places to check out for meals that will satisfy your hunger while handing you a dose of local flavor.

Clary's Cafe  (located on Habersham Street, Midtown)
I just only recently experienced Clary's for the first time with my friend Jessica.  We went to the Habersham location which is right up the block from her house, but there is also the original Clary's located downtown on Abercorn after LaFayette Square.  The downtown location was featured prominently in Clint Eastwood's Midnight in the Garden of Good and Evil .  I have only been to Clary's once but I have been craving this place since I left that faithful Sunday afternoon.  If you like diners (I love them, especially after spending my formative years frequenting various diners on Staten Island) this is a must stop.  I had the Alpine Burger (topped with Swiss cheese and mushrooms)with fries and a Black & White shake.  Always being down for a good, greasy diner burger, this burger satisfied my craving and left me begging for more.  They serve breakfast all day and their giant homemade chocolate eclair is to die for.  The only downfall to this restaurant is they are open to 4 pm, which makes dinner plans impossible.  

Crab Legs!

The Crab Shack (located off of Rt. 80, Tybee Island)
If you love seafood as much as I do, then this is a must stop.  After spending my 25th birthday at The Crab Shack, I have revisited it numerous times.  After introducing this gem to my parents, we usually make a trip out to Tybee at least once when they come down to Savannah to feast here.  We are already planning our next trip for my 28th birthday next month.  The must have item off their menu is the Shack Specialty, a platter topped high with shrimp, mussels, crab legs, craw fish, sausage, potatoes and corn smothered in Old Bay and served with melted butter.  The platter for 2 can successfully feed a family of 4.  Other noteworthy menu items are the raw oysters, steamed clams and their key lime pie is the perfect ending for a seafood feast.  This is a restaurant where you want to kick back on the outside deck with some good friends, enjoying the kitschy atmosphere with a beer or a mixed drink served in a coconut carved like a monkey head and have a great time. 

Ruan Thai (located on Broughton Street, Downtown)
My husband and I are big fans of Asian cuisine, with the exception of Korean.  Thai is definitely up there on my list, along with Indian and Japanese.  I love all things spicy and Thai food definitely delivers on the heat factor.  Mike and I discovered Ruan Thai when he was home on R&R from deployment and we went there for a date night.  This restaurant, located downtown is one of my favorite date night spots, featuring intimate booths, extensive wine list and low-lighting.  The food is also amazing, from perfectly fried spring rolls to the red seafood curry to the fried bananas.  The entrees are mid-range in price, which is why we reserve this restaurant for date nights but the dining experience at Ruan makes it worth every penny.  


Troy Mediterranean (located on Abercorn St. after Wilshire Blvd)
I credit Troy with inspiring me to start this blog and it has a rightful place on the list. We are lucky enough to live practically around the corner from this place. If you love Greek/Turkish/Mediterranean cuisine and are looking for something different in Savannah then this is a must stop.  This is another restaurant we reserve for date nights due to the atmosphere and quality of the food.  This is a welcome change of pace from the chain restaurants and Japanese steakhouses located on the Southside. If you stop here, get the lamb chops and top off your meal with the baklava, it's to die for!


Pancake Palace (located on Abercorn St. past Eisenhower Blvd.)
Words cannot express how much I love love love the Original Pancake Palace.  We discovered this place almost 2 years ago and this is our go-to restaurant for a family meal out.  My daughter loves this place as much as I do.  This is the definitive local greasy spoon in Savannah where the breakfast is absolutely to die for.  The best part not only are they open 24 hours but they serve breakfast all day.  If you don't mind a restaurant that is rough around the edges, where the waitresses become your friends and is frequented by locals then this is the place for you.  While their pancakes are good, the go-to breakfast carb here is the french toast - thick texas-toast style slices dipped in just enough egg so they are never soggy and griddled to perfection.  They are even nice enough to swap out the pancakes for a slice of french toast if you ask.  The hash browns are amazing, putting Waffle House's to shame.  Ever since we discovered this small slice of local diner heaven, we haven't returned to our local Waffle House or Cracker Barrel, Pancake Palace tops them both.


Tuesday, February 22, 2011

Somewhere Over the Rainbow Cookie


I think I am still recovering from this weekend.  On Saturday, I spent the day in Hilton Head Island, SC with Jessica and friends finally enjoying the beautiful weather the South forgot to dish out this year.  I didn't get back home til almost 1 AM where I proceeded to crawl into bed like a zombie.  Mike let me sleep in Sunday morning and though I slept for 8 hours I was still lagging once I got up, even after 3 cups of coffee.  When nap time came Sunday afternoon I dutifully crawled back into bed only to awoken by Rex trying to claw his way through the sliding door of our room.  Knowing I wouldn't be able to go back to sleep, I decided to make my rainbow cookies, a recipe I have written about previously that I was slacking on actually attacking.

I got up, still in PJ's and dragged my Macbook into the kitchen so I can follow the recipe from Smitten Kitchen, a fellow food blogger from NYC that shares my love of these little layered cookies of goodness.  Living in the South, Rainbow (or seven-layer) cookies aren't in high demand.  In the almost 5 years I have lived here I haven't seen any available for purchase, not surprising for the state where whipped cream is a suitable cannoli filling.  Since I haven't been back home since May, I needed a taste of home and looking for writing fodder I decided to make this recipe.


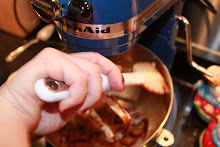
Rainbow cookies are relatively simple, but labor intensive.  If you are a novice baker and don't know the difference between creaming butter and Betty Crocker  box mix, I could imagine this recipe being harder.  I also wouldn't want to attempt this recipe without my Kitchen Aid (or a hand mixer), the thought of making meringue and creaming butter by hand sends shivers down my spine.  Three steps into the recipe I started having a  migraine.  Maybe being sleep deprived wasn't the best time to try a recipe I have never attempted.  I also should have read through the recipe a few times before starting, because when I separated my eggs for my meringue I discarded the egg yolks only to find I needed to incorporate the yolks later in the recipe.  I went into Mike's office where he was working on a drawing project for school to beg him to run to Publix to get a carton of eggs.  This was after I *briefly* considered how bad it would be to fish the yolks out of the just-changed garbage. Mike dutifully went to Publix for a carton of eggs while my recipe came to a standstill.

Once he returned, I separated 4 more eggs and this time I put the egg yolks in a bowl.  I carefully folded the meringue into the batter and prepped my 2 13x9 in casserole dishes with wax paper and butter to bake 2 out of 3 layers of the cookie.  My daughter Lily helped me mix the green and red food coloring into the divided batter and I set out to bake the layers.  While the green layer was in the oven I also decided to make meringue cookies with my left over egg whites, finding a recipe in one of my trusty cookbooks.  At this point, I had already spent 1.5 hours in the kitchen and I was nowhere near done.  Once all the layers were baked I made a make shift cooling station out of three wire racks and a stationary fan aimed directly at the cooling layers.  I knew I could only assemble this cookie once all layers were adequately cooled and I had already come so far, I didn't want to mess up this recipe with my impatience.  I was already facing 2 hours in the kitchen and I was starting to tire out.

Assembling the layers was easier than I first thought. Since the cakes were still on the wax paper they were baked on, I found it surprisingly easy to invert them on the cookie sheet.  In between each layer goes a layer of preserves, I used apricot preserves that I reduced down to a liquid consistency which wasn't called for in the recipe but it definitely helped.  Once the 5 layers were assembled- green layer, apricot, white layer, apricot, red layer- I wrapped up the layers in plastic wrap then topped them with a cookie sheet I weighed down with a jar of salsa and placed the layers in the fridge to chill for the foreseeable time.  The recipe called for 8 hours fridge time, knowing how impatient I am I knew I wasn't going to wait til Monday morning to finish the last part of this recipe - drenching the top and bottom layers with bittersweet chocolate that once chilled, would make a thin chocolate crust whose taste w cuts through the almond-apricot sweetness of the cookie.

Once the kids were tucked into bed, I set up my double boiler on the stove.  I am pretty much useless once the kids go to bed, my nights are better spent sitting my bum on a comfy piece of furniture doing mindless tasks like Internet bingo than melting chocolate and sugar in a double boiler (I had unsweetened chocolate in the house, the recipe called for bittersweet).  I knew the water should be barely simmering but my night-fogged mind decided to bring the water to a roaring boil under the double boiler then lowering the heat which would make the stainless bowl too hot to melt chocolate correctly.  If you are a seasoned baker, you know I was setting myself up for failure.  My first layer of melted chocolate was was the right consistency for spreading on the top of the cookie, the chocolate for the last layer of these cookies seized like an epileptic off their pills.

 I was so close to victory and there sat my chocolate in a clumpy grainy mess.  I plopped myself down on the couch, my 95% finished cookie chilling in the fridge unknowingly preparing for the last layer of chocolate and I was out of baking chocolate.  I knew my husband would be in no mood to make  second trip to the store so I decided to see if I could save the last of my chocolate.  I don't know what people did before the Internet and I don't ever want to relive those days again. I grabbed my trusty Macbook and I googled how to save this recipe.  I wasn't about to accept defeat.  When chocolate seizes, the cocoa butter separates from the cocoa solids but if you incorporate some vegetable shortening or vegetable oil, the mixture homogenizes once again.  Searching my pantry for the vegetable shortening left over from Christmas cookie baking, I felt like a marathon runner seeing the finish line for the first time.  I was almost done with these cookies.  I dutifully mixed the shortening into my seized chocolate and though the consistency wasn't exactly like properly attended melted chocolate it would suffice.  I spread the last layer on the cookie all while exuding the confidence of a second place win and put my cookies back in the fridge for another 30 minutes to allow the layers to all properly set.

45 minutes layer I cut the first of my rainbow cookies and promptly served the rewards of a long day in the kitchen to my husband.  After eating the first bite, my husband smiled then looked over to me and said "You made rainbow cookies" with a boyish giggle he usually reserves for when I do something right.  After 6+ hours in and out of the kitchen, that smile made all the hard work worth it.  I made rainbow cookies, yes, yes I did.

* On a side note, my almond meringues were pretty awesome too.  The kids and Rex enjoyed them all too much and they were devoured in a sitting before I could grab my camera to capture one fluffy crumb, nevermind a whole cookie.  Next time :)
** If you want the recipe, click the Smitten Kitchen link above.  It is long and Deb typed it up with more justice and grace than I ever could. It is also available through the Epicurious  app since it was originally printed in Gourmet  in 2005.

Friday, February 18, 2011

Sausage and Peppers

A few weeks ago, I was on the phone with my best friend and we were discussing Super Bowl.  She is a bigger football fan than I am so for her it is like a national holiday.  She had company over the night before and she was discussing what she made for her guests when she asked me how I make my sausage and peppers.  Sausage and peppers is an Italian mainstay, though my husband disagrees saying everyone makes  it.  I rebutted that Italians make it better when I was responded with an eye roll. I have had sausage and peppers that used kielbasa sausage and that taste was nothing like the Italian sausage and peppers I grew up with. In fact, it was lacking in flavor. It is one of those quintessential dishes that I am sure there are probably a gazillion variations, but I prefer any Italian sausage version.

 Sure enough, my best friend's version utilized mixing the sausage and peppers with a simple marinara sauce served on hero rolls (aka sub rolls aka hoagie rolls, depending on what part of the country you come from).  I have made sausage and peppers this way, usually when I am serving it over macaroni.  In fact, this is one of my husband's favorite macaroni dishes and I would make it quite often in our early marriage.  But when I make sausage and peppers to be served on a hero, I forgo the marinara and keep it simple, letting the flavors of the Italian sausage and sauteed peppers and onions speak for themselves.  This is one of those easy dishes that is perfect for a quick dinner and the left-overs are always better the next day.

In my version of sausage and peppers, I use hot Italian turkey sausage in lieu of true Italian pork sausage.  It has considerably less fat and the flavor is comparable to it's pork counterpart.  Usually I use hero-style rolls but the other day when I made this dish I had sliced ciabatta bread that needed to be used before it went to the birds, literally.  When my husband walked in from school, before he even said hi to me he said the house smelled amazing.  After all the years we have been together, the smell of garlic sauteing in oil smells like home just as much as it reminds me of my childhood.  Needless to say, we each had two sandwiches for dinner that night.  We enjoyed every bit of them.


Sausage and Peppers
1 pack Hot Italian Turkey Sausage (you can use sweet or mild if you aren't down with the spicy)
2-4 Tbsp of olive oil
2 cloves garlic, chopped
1 onion sliced
1 1/2 bag frozen sliced pepper mix or 3-4 fresh peppers, sliced
1-2 Tbsp Italian seasoning
1 tsp red pepper flakes (optional, I use them because I like things spicy)
s&p
pack of hero loaves or sliced Italian bread
  • In a large skillet, head up 2-3 tbsp of olive oil, once hot add garlic and allow to saute for a minute or til the garlic starts to brown.  Add in onions and let saute 1-2 minutes.  Season with s&p if desired, I use a little salt whenever I saute onions because it helps bring out the moisture in the onions.
  • In a separate frying pan, drizzle about 1 tbsp of olive oil and brown sausage on all sides.  Once browned add enough water so the sausages are half immersed in water.  Cover and let cook.
  • Once onions have been sauteing for 1-2 minutes, add peppers, Italian seasoning and pepper flakes. Stir. If the pan gets dry, you can add a little bit more olive oil (which I had to do). Sir regularly to prevent peppers and onions from sticking. Saute til the onions caramelize and the peppers are soft and starting to brown.
  • Once sausage is cooked through, add sausages to the onions and peppers and let cook 1-2 minutes to incorporate flavors.  I usually cover the sausages with the onions and peppers when doing this.
  • If you would like coin shaped pieces of sausage, cut sausage up in disks before adding to peppers and onions like I did, or you are more than welcome to keep them whole.
  • Serve on hero rolls or on sliced Italian bread.  Mangia!


Thursday, February 17, 2011

A Day in The Life of Rex and Me

I know this is a food blog, and I have two blogs that I have been brainstorming about all week that I will share, once I find the time.  This blog entry is dedicated to my Boxer, Rex who pretty much saved my life today.  I am sure within in the coming entries there will be one for the delicious dog biscuits I plan on making for him but I figured since this is my soap-box, I have to give tribute to my rescue dog first and then tackle the yummy goodness later.  What good would this blog be if I wasn't here to write it?

Today, while out for our regular, hour-long walk, Rex and I decided to take a short-cut home since I noticed he was starting to get heat fatigued due to the summer-like weather we have been having in Savannah.  I know Boxers are more susceptible to overheating due to their foreshortened snout and the short-cut I intended on taking would pass by a house with three "lawn-ornament" pit bulls in the backyard.  Normally I wouldn't take this way since one of the pits has a tendency to jump the 4ft chain link fence in the backyard.  I checked the yard quickly as I turned on the block and didn't see the dogs in the back so I continued on my way.  Sure enough, I watched as the red nose pit climbed the fence and come charging at us.  I told the dog to "go home"and this is when he lunged at me.  Rex got right in front of me and the pitbull bit his face and a dog fight ensued. Since I am not a friend of Michael Vick,   I broke Rex away and the dog ran off only to charge back at us.  Rex growled and the dog ran back to his house, trying to scale the fence.  I noticed blood on Rex's face as I stopped to gain my composure.  The neighbors heard me curse "fucking assholes" towards the house and came out to tell me to report  the incident; they were tired of this dog constantly breaking loose out of his yard.

I came home, shaken and in tears.  I told Mike that we are never getting rid of Rex for any reason and followed that with the story of what happened.   He isn't always Rex' advocate as it was I who wanted a dog, not him. Rex, being a rescue has issues due to the neglect he suffered and Mike sometimes loses patience with his antics, namely the counter-surfing. I think today that part of Mike changed after he saw the bite mark on Rex' head and his limping.  I called up Animal Control and made an appointment at the Vet.  Animal Control issued me a subpoena to appear in court next month since the owners of the dog was cited with "dog at large".  Rex went to the vet and luckily the bite mark was superficial and he got a rabies booster, some antibiotics and lots of kisses from the Vet and Vet Tech who had to shave his head.

I am so very grateful for my dog, for fearlessly protecting me.  We rescued him because I don't believe in purchasing a dog for  hundreds to thousands of dollars when there are so many who need homes and the cost is a fraction of the purchase price.  He may have issues but he is my dog and I am willing to do anything for him, especially after he proved to me he was willing to do the same.  He has brought so much joy to our home and after today, he is my hero and my mushface.

like a true boxer, he was cut above his eye

Saturday, February 12, 2011

A Tale of Two Pizzas

I swear, every time I am about to start blogging my dog and 20 month old smell the creative synapses in my brain starting to fire and they hound me to no end. Sometimes I swear these two are actually brothers, hence why I call them Frick and Frack, they both think on the same wave length which makes me undecided over whether to be overly concerned for my son or overly astonished that my dog thinks like a human. When I was trying to write my Random Banter post from the other day Rex just would not leave me alone.  First, he needed to be let out for the thousandth time that day, then the amount of water in his bowl wouldn't suffice for his thirst quenching needs.  Then he spent the latter part my blogging time hogging my bed and nudging me with his muzzle.  I guess if I am ever taken hostage and forced to write while getting head butted all over various parts of my body I'll be able to manage. Today was no exception, having to kick Rex and Nate out of bedroom, Rex being an overall pain and Nate brandishing the whisk attachment to my Kitchen Aid menacingly as I booted the both of them out of my bedroom.

Anyways, yesterday just reminded me why I think I shouldn't try to cook something new on Fridays. I am not Jewish, but I think they got it right by celebrating the Shabbat on a day where culinary endeavors, mainly in my kitchen, never seem to go right.   I knew I wanted to try my hand at making homemade pizza and once my husband came back from school I knew I would have the time to dedicate to making my pizza dough and toppings.  Sometimes I wonder if there is a ghost in my house, because the other day a pizza dough recipe I had stashed in one of my many cookbooks was splayed out on my counter.  I went through the recipe and when I saw the recipe included overnight preparation I stalled on making the dough.  Plus I was going through the MIA meat thermometer debacle and that recipe made it to the wayside.  I checked my BH&G New Cookbook for their version of pizza dough and seeing that it only took about 30 minutes of prep time, including resting the dough, I decided to go that route.  Now I wished I didn't.

fresh mozzarella goodness

Since the recipe produced two pizza doughs I decided to make two pizzas.  The first pizza I attempted was a margherita style pizza which could be considered the great-grandmother to the modern day pizza that is served today.  For those who don't know the history of pizza, I'll give you the story in short.  A Neapolitan baker was asked to prepare a dish for Queen Margherita of Italy during the latter part of the 19th century.  He derived a pizza using fresh mozzarella, basil and tomatoes to represent the 3 colors of the Italian flag and hence the Margherita pizza was born.  Margherita pizza is one of my favorites since it utilizes fresh mozzarella, which is probably my all-time favorite cheese.  Growing up in an Italian household, we ate fresh mozzarella a lot and there is nothing like it.  The taste, in my opinion is completely different than the block mozzarella you get in the grocery store, it has a soft texture and a mellow, creamy taste taste.  Luckily, better grocery stores in Savannah carry this cheese but it isn't always cheap.  The container of fresh mozzarella I procured at Publix was almost 12 bucks a pound for 3 4oz-ish ovaline mozzarella balls.  It is well worth the money.  If you haven't tried fresh mozzarella but like the block kind, definitely try it.  It is a whole different, creamy ball game.

So I prepared the pizza toppings from a recipe I found on Epicurious (that app is amazing, if you haven't downloaded it yet and you own any one of Apple's fine gadgets I suggest you download it today).  Their recipe called for refrigerated dough and I haughtily thought I had a step up on this pizza making adventure since I made my dough from scratch.  I prepared the charred tomatoes for the topping and dutifully sliced my fresh mozzarella and diced my block mozzarella that the recipe called for.  I even perfectly chiffonaded my basil.  All this precise prep to have my pizza dough fail on me.


When the pizza came out of the oven it looked delicious.  After my time working in a pizzeria, I knew to let the pizza rest before cutting and when I started the pizza wheel through my work of art I knew right away something was wrong.  The crust was difficult to cut through but I persevered on.  I served the pizza to Mike and the kids then put the subsequent pizza I had prepared, utilizing diced chicken cutlets and the gupesto  I had made earlier this week.  I took a bite of the pizza and right away I knew the pizza was not only overcooked (my fault for following the baking time corresponding to refrigerated dough in the Epicurious app) but the dough had absolutely no flavor. Most people say the pizza outside of NY tastes like crap because of the lack of NY reservoir water.  We installed a way too expensive water filter on the house when we bought it to have water that resembled NY water at least in taste so I knew that wasn't the only problem with my dough.  This is the first time a recipe from my BH&G cookbook has failed me, the dough's taste was less appealing than a communion wafer.
Chicken Cutlet and Gupesto pizza before baking.

I will not be discouraged though, the next time I make pizza I won't be lazy and use the more time consuming recipe.  Maybe next time the crust won't make me want to genuflect after eating a slice.

Thursday, February 10, 2011

Random Banter

It has been an exhausting week and I feel terrible that I haven't dedicated more time to the blog,  especially since I have cooked dishes that have a rightful place here as they are my own.  After a long day of cleaning and running around after a rambunctious 20 month old, I am lucky if I can string together short sentences that don't make people ask exactly how much have I have had to drink today (never mind that I am sober).  So since I wanted to update the blog with the least effort necessary I am just going to list off random food based thoughts and quips from this past week.  I promise to update tomorrow with new recipes I have worked on this week, but for now I am going to be short, sweet and to the point.


  1. Since I have started this blog my husband has gained 10 lbs.  He informed me of this little tidbit last night while watching season 3 of The Big Bang Theory (the latest show I am obsessed with).  I blame it directly on the baklava.
  2. Last weekend during my shopping expedition, I bought a meat thermometer.  Christmas day I made a horrible mistake by leaving my instant read thermometer in my prime rib.  I used this new meat thermometer to measure the liquid temperature for my bread, figuring it was multi purpose.  Two days after baking my awesome bread my meat thermometer goes missing.  I seriously tore my house apart looking for it since I needed it to make pizza dough.  Mike was in Target again yesterday where he bought me another meat thermometer and an instant read thermometer.  They are professional quality and I was giddy that he was thoughtful enough to bring me home these awesome kitchen gadgets.  Tonight when he was putting my son to bed, he went on a search for my son's Batman and Green Lantern plushies (his favorite toys).  Low and behold, my new-as-of-last-weekend meat thermometer was in his CAT duplo truck.  Guess Nate needed to figure out the temperature of legos...
  3. And while we are on the topic of my son, I should know better than to take my son out to eat.  Last week we took the kids to Ruby Tuesday's since I received a coupon in the mail.  My son managed to spill about every food item on the table on himself. It even came to the point that I told my husband I didn't care how much spray and wash I had to use on his clothes, I wasn't going to fight him for my iced tea that he stole, or the ketchup, or the honey mustard he used to paint his face with a la Buffalo Bill from Silence of the Lambs.  Proving my memory sucks, I suggested tonight we should go out to eat.  I had a long day cleaning and Mike readily agreed to Texas Roadhouse.  My son tried sticking a crayon in his juice along with ripping up his sister's coloring mat and stealing all the marshmallows off my husband's sweet potato.  Needless to say we hurried out of there as soon as our dinner was over, before my son started to throw plates or let his screeches hit pitches only the neighborhood dogs could hear.
  4. I don't know how I feel about Man Vs. Food, the show where a nice Jewish boy from Brooklyn goes around partaking in every food challenge available in this great country of ours.  While I do enjoy seeing slices of foodie Americana I haven't experienced before, I think I the reason I watch it is I am patiently waiting for the day he has a massive coronary after one of his food binges. 
  5. I made 4lbs of chicken cutlets this week and I don't think I have one left to photograph for my chicken cutlet recipe blog entry.  This family eats chicken cutlets like they were starving, and with my husband's recent weight gain we know that lack of food isn't a problem in this house.  Alas, I feel my chicken cutlet entry will have to wait til I make them again.
  6. Publix makes pretty decent cannoli's. I made gupesto last night for dinner and since I needed basil for the recipe I made my obligatory stop at Publix.  The bakery manager, knowing I was a New Yorker by my still-thick accent let me try to cannoli cream before I purchased any.  It was pretty accurate though I should have told her to add a little more cinnamon and chocolate chips to the cream.  It doesn't matter, they were the perfect dessert for my dinner last night and Mike fought me for the chocolate drizzled cannoli. 

Monday, February 7, 2011

Recipes!! Homemade Bread - Herbed Butter - Butternut Squash and Leek Risotto

This weekend was crazy.  Besides taking Lil shopping all day Saturday, I ran around all day Sunday.  I took the kids to church with my friend Jessica then out to lunch to Screaming Mimi's for some delicious pizza and topped it off by going back to her house to let the kids (she has a 2 year old son) run amok.  I finally have time to post the recipes from Saturday night's feast in which I hope you all enjoy my errant display of food porn!

There is must be some kind of karma that works when it comes to recipes, since I started this blog some loyal readers have sent me recipes for their culinary endeavors which I saved to my food bookmark tab.  I can't wait to try them and share my experiences here and I urge you all to try new recipes this week.  You just may find something that you love!


Homemade White Bread (modified from Better Homes and Garden's New Cookbook)
5 cups bread flour
1 pack Fleishmann's Rapid Rise active yeast
2 1/4 C milk
2 tbsp sugar
1 tbsp butter
1 1/2 tsp salt
  • In a large mixing bowl combine 2 1/2 C of flour and active yeast.
  • In a sauce pan heat and combine milk, sugar, butter and salt til 120-130 degrees F.  Check with thermometer to ensure the liquid isn't too hot for our yeasty friends.
  • Using a stand mixer or hand mixer, combine liquid to the flour yeast mixture.  Beat on medium (I used setting 4 on my Kitchen Aid) for 30 seconds while continuously scraping the bowl.  
  • Raise speed on mixer to high (I used setting 8 on my stand mixer) for 3 minutes.
  • Using a wooden spoon or spatula, combine the rest of the flour into the starter dough.
  • Knead for 6-8 minutes by folding bottom part of the dough over then turning 1/4 turn and repeat.
  • Let rest 10 minutes.
  • Grease two loaf pans.
  • After resting, cut dough in half with dough cutter.  Form loaves by pinching the dough under in an loaf shape.
  • Cover loaves with a cotton towel and let rise about 30-45 minutes in a warm, draft free place (I did this on my stove top, I should have done it in the oven.  And don't be paranoid like me, I incessantly checked it. )
  • Once doubled, preheat the oven for 375 degrees F.  Bake for 35-40 minutes til bread is brown.  
  • Remove from loaf pans and cool on wire rack.
Herb Butter
1 stick of unsalted butter, softened
1/4 C of fresh basil (small handful)
1/4 C fresh parsley    "           "
1 clove of garlic, chopped
about 1 tsp sea salt
1 tsp fresh ground black pepper.
  • Allow butter to soften.  I did this by putting it in a bowl and letting it sit on my stove while I worked on my risotto.
  • Finely chop basil and parsley.
  • Chop up a clove of garlic, add sea salt.  using the side of a knife make scraping motions over salt and garlic til a paste forms.
  • In a bowl, combine butter, herbs and garlic paste.  Season with pepper to taste.
Butternut Squash and Leek Risotto (modified from a Bon Appetit recipe featured in Epicurious IPad App)
2 C Arborio Rice
32 oz container vegetable stock
1 C water
1 large butternut squash, cube
3 heads of leeks, sliced, using only light green and white parts
4 tbsp olive oil
1 tbsp herbes de provence (if you can't find it, you can use thyme)
2 tbsp butter
1/4 C fresh basil, chopped into strands
1/4 C of grated cheese (I used pecorino romano but whatever you prefer is fine)
s&p to taste.
  • In a large heavy bottom pot, add 2-3 tbsp olive oil and heat on medium.  Add butternut squash, season with s&p and sautee for about 5 minutes til softened.  Put into bowl and set aside.
  • Add more olive oil if needed and add leeks and herbes de provence.  Sautee for about 5 minutes but do not allow leeks to turn brown.
  • Add rice to pot with leeks and cook for about 1 minute.  Lower heat to low-medium and add 1 C of vegetable stock and stir til fully absorbed.
  • Once liquid is fully absorbed, add vegetable stock and then water by 1/2 cupfuls, making sure liquid is fully absorbed before adding more.  You will need to continuously stir the risotto to ensure it doesn't stick to the pot.  This should take about 15-20 minutes.
  • Once all liquid is absorbed, add butter, basil, grated cheese and simmer on low heat for 10 minutes.
  • Risotto should be creamy.
  • Serve with a sprinkle of grated cheese and some s&p if desired.


Sunday, February 6, 2011

The Yeast Is Not Dead

Today, my horoscope told me it would be a perfect day to curl up with a book and relax.  That would have been an ideal task, especially with all the books my husband downloaded to my Ipad for my enjoyment.  Unfortunately, it wasn't mean to be.  After avoiding the commissary all week, I had to finally break down and go food shopping.  So armed with my grocery list in hand, I took Lil with me for a day of shopping.  First we hit Target to pick up the baking supplies I needed to tackle homemade bread and my rainbow cookies.  Then we headed to the commissary only to find that they didn't have a some of the most important ingredients that I needed for this week's worth of recipe.  So we found ourselves at Publix where it is truly a joy to shop.  I can't get into my love for Publix here, that is a whole blog post within itself.  The funny thing is we ran into a retiree we saw in the commissary who also made his way to Publix where we got to commiserate in the spice aisle over the fact the commissary doesn't carry half the stuff that we needed and we both just wanted to get home after a long day of food shopping.

So we got home, my husband helped me unload all the foodstuffs and after I took a quick breather, I asked Mike if he was ready to tackle bread.  Before I even started this food blog he had been hounding me to bake bread from scratch. I kept on putting him off due to my fears of murdering yeast. Figuring this would become good blog fodder, I decided to tackle bread making this week and I am glad I did.  We cleaned off the counter in our kitchen (I can't work in a messy kitchen) and Mike started preparing the wet ingredients for our bread while I mixed the flour and the yeast.  I took the temperature of the wet ingredients and it was a perfect 130 degrees.  I said a quick prayer for any yeast that might be harmed in our first bread baking adventure and I mixed the ingredients in my Kitchen Aid.


Once everything was all incorporated, I started to knead the dough.  I used to work at a Living History museum in Staten Island (Historic Richmondtown) and we used to bake bread there in the wood burning oven in one of our houses.  I was well schooled in kneading bread from helping out on festival days and I showed Mike how to knead bread because I knew he was going to have to take over for me. 

Sure enough, half way through my hands were tired and Mike finished off the bread kneading.  He totally got into the bead braking and before we knew it the dough was smooth and elastic like the recipe called for.

I let the dough rest and then I followed the steps on the back of the yeast pack.  I had bought quick-rise yeast by accident so I had to alter the recipe from the cookbook to allow for the quick-rise adjustments.  I don't like tampering with baking recipes when I am in uncharted territory so I was starting to worry about my dough rising.  I formed the loaves and covered them with a tea towel on top of my stove and I got started on my butternut squash and leek risotto. After the tenth time asking Mike if he thought the dough had risen enough before I placed it in the oven and he told me to calm down.  I am not a fan of failure and the idea of "dead" bread was upsetting me.  When he assured me that the dough did double and I needed to relax I reluctantly preheated my oven for my bread.  I also took out a stick of butter to be softened for my herbed butter.

While the bread rose and baked I made Butternut Squash and Leek Risotto, a recipe I had found in my Epicurious app got started on the prep work.  I love risotto but I have never made it by scratch.  I have either eaten it at restaurants or made box risotto when the craving strikes.  This recipe was simple but it is also time-consuming -  you can't leave it for more than a few minutes without stirring the risotto insuring that it isn't stuck to the bottom of the pot.  I dutifully stirred the risotto all while thinking of the Hell's Kitchen episode when one hopeful chef just couldn't get the risotto right and Gordon Ramsey spewed an onslaught of curses at this one inept chef.  It was in between stirs of risotto that I took a peak at my oven and noticed that my bread had risen beautifully and was baking to tasty glory that I got the confidence I needed to finish out my dinner.  Gordon Ramsey's voice in my head stopped at this point, without even needing the Thorazine I was seemingly destined for.

Once all the liquid was incorporated in the risotto, I had to let it simmer for ten minutes.  I threw in a few tbsp of butter to gloss off the risotto and I started on my herbed butter - the one dish I was confident about from the start.  I had let my butter soften in a bowl on top of the stove so it was the perfect mixing consistency.  I chopped up a few tbsp of Italian parsley and basil and then I made a garlic paste.  Making the garlic paste was easier than I thought.  All you need is a clove of garlic and some sea salt and a knife. I love sea salt and it is the only salt I use to season my cooking.  I think it genetic destiny my love of sea salt, for my Sicilian ancestors were from outside Trapani and it is said that they worked in the salt mines located there. Whatever the case, sea salt just tastes better than iodized salt. My husband cracked the pepper for me, making sure to ask if I wanted "fresh pepper" as if I was in an Adam Sandler sketch.  This moment of levity culminated the end of nearly 2.5 hours in the kitchen, my risotto was creamy goodness, my perfectly browned bread cooled on baker's racks and my herbed butter was to die for.  I had successfully tackled homemade bread and risotto on the same night!  All of this success while my 20 month old son dumped out the dog's water bowl and decided to add more water from freezer dispenser to the floor instead of the misplaced water bowl.  

After dinner was over, Mike couldn't get over the fact that "I had made bread".  We ate almost 1 whole loaf with dinner for there is nothing better than warm bread and butter.  There was no APB out for my yeast murder, no Gordon Ramsey yelling in my head.  It was a true kitchen triumph!